|
<< Click to display Table of content >> Add a mound |
  
|
|
<< Click to display Table of content >> Add a mound |
|
•From the ribbon Model, click on the button ![]() in the group Add items.
in the group Add items.
•The Line tool is now active. Design the geometry of the new object (the axis of the mound). Complete the entry by pressing the key Enter.
•The Mound box is displayed so that the parameters of the input line can be entered. The Z column represents the elevation at the bottom of the mound.

Mound interface
•Select a Height interpolation mode:
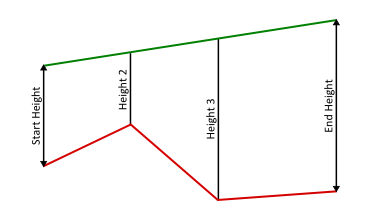
![]() No interpolation: the starting and ending points are directly linked. The heights are then determined in relation to the
No interpolation: the starting and ending points are directly linked. The heights are then determined in relation to the
 No interpolation |
|
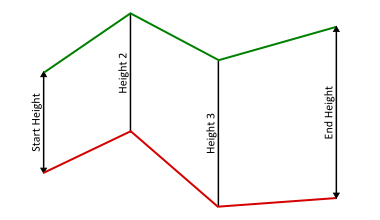
![]() Depending on the distance between the points: heights are calculated in proportion to the 2D distance from the starting and ending heights. This gives the heights with a 'linear' evolution.
Depending on the distance between the points: heights are calculated in proportion to the 2D distance from the starting and ending heights. This gives the heights with a 'linear' evolution.
 Interpolation by the distances between points |
|
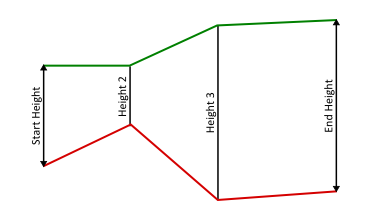
![]() User defined: with this option the height fields can be modified by the user.
User defined: with this option the height fields can be modified by the user.
 User defined interpolation |
|
•Enter a Starting height and an Ending height, a Width at top (the diagram is automatically modified).
•Enter a Comment if required.
•Click OK to confirm.
The mound is then created in the 'Ground' overlay in this form:
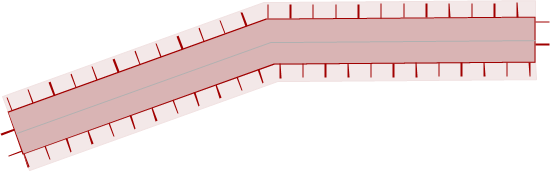
The areas of the top and bottom of the mound are used to calculate the DTM and for acoustic simulation.
|
When creating mounds, the DTM is not recalculated automatically. Therefore, it is advisable to update the model after creating mounds |
|---|