|
<< Click to display Table of content >> The variants |
  
|
|
<< Click to display Table of content >> The variants |
  
|
The variants allow to create and simulate several configurations into only one project. For example, an initial state without noise barrier, and a futur state with noise barrier.
Only one variant can be visible at a time.
Actions on a variant
From the Project window, you can edit, copy, add or delete a variant using the buttons ![]() .
.
Note that the button Delete is available only if at least 2 variants have been created.
How to know the number of object present in a variant?
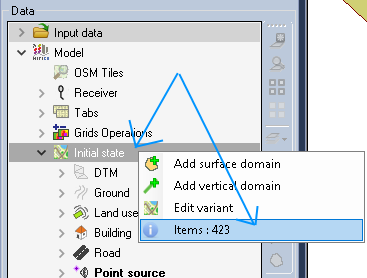
To know the number of objects on a variant, do a right-click n the name of the variant. The number of objects of the variant is listed in the context menu.

Variant interface
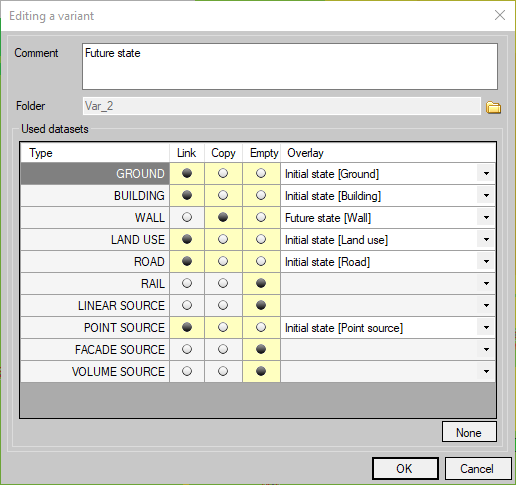
When clicking on one of the buttons above, the interface window appears.

Variant interface
It includes:
•Comment: the name to give to the variant.
•Folder: Windows folder where are stored the MithraSIG simulation and data of the variant (it cannot be modified).
•Used datasets: is used to indicate which datasets to use for the variant.
Used datasets
The variants are based on datasets that can be common to several variants, or specific to some of them. This principle is useful when there is only one type of data to modify in the project.
For example, for the height variation of a noise barrier you could have a initial state without the noise barrier, and other variants with the noise barrier to change the height. But the terrain, roads, buildings would be common to all variants as just the noise barrier has to be modified. Only the noise barrier overlay would be specific to each variant.
•Type: type of MithraSIG dataset.
•Link: the link allows to used the data of another variant, it would be common between the variants. All modifications on the variant 1 are reported on the variant 2.
•Copy: the copy allows to copy the data from the variant 1 to the variant 2, making it specific.
•Empty: means that you don't want this type of data in the variant. But a new integration is possible.
•Overlay: is used to determine which overlay of which variant to use.
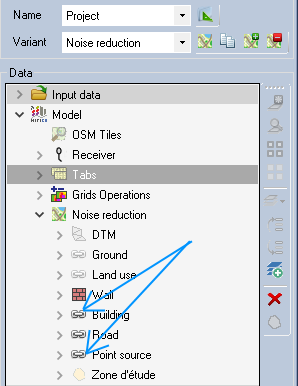
When a new variant is created with linked overlays, overlay icons are displayed like this ![]() . With this icon, it's easy to see quickly which overlays depend of another variant.
. With this icon, it's easy to see quickly which overlays depend of another variant.

Linked overlays
Variant selection
When you have several variants in the project, use the drop down menu to switch with another variant in the Project window.
