|
<< Click to display Table of content >> Operating modes |
  
|
|
<< Click to display Table of content >> Operating modes |
  
|
The operating modes are used to describe the acoustic impact of a ship.
One operating mode consists of providing information on the position and power of each source present on a ship during a given action.
To add, delete, edit an operating mode, this can be done either by editing the operating modes of a project, or when editing a ship.
Edit operating modes of a project
From the MithraSIG ribbon, click on the ![]() button in the Parameters section of the Model tab.
button in the Parameters section of the Model tab.

Editing of operating modes
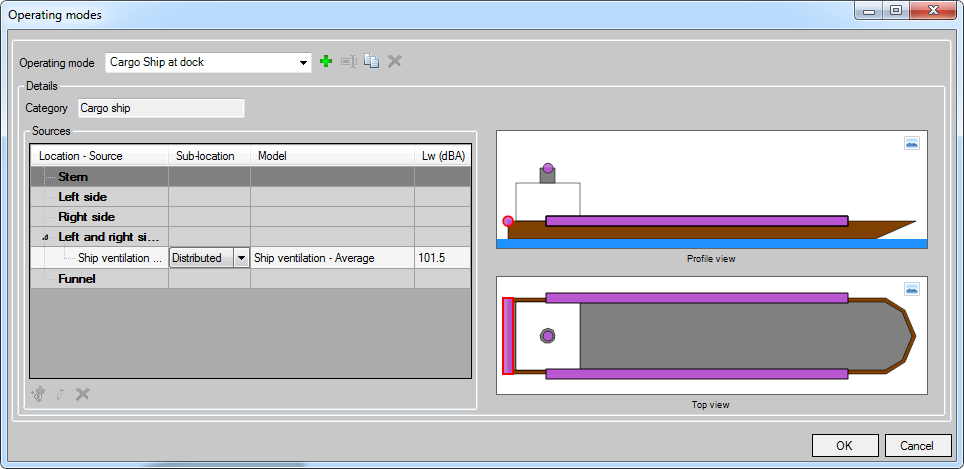
The interface for editing the operating modes opens.

Operating modes
Edit operating modes when editing a ship
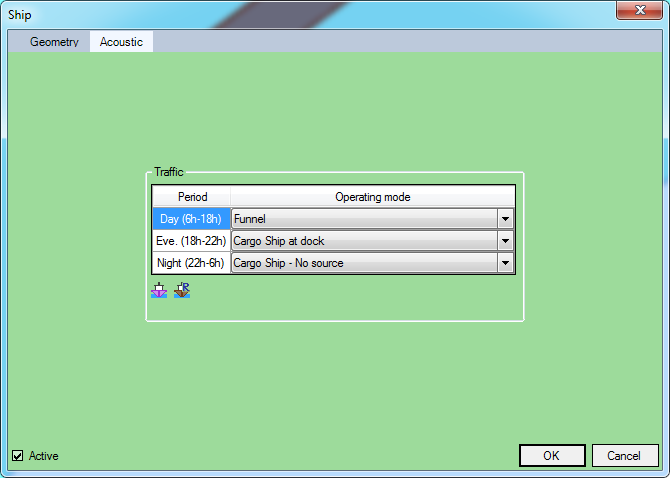
When editing the acoustic parameters of a ship, click on the ![]() button to access the operating modes.
button to access the operating modes.

Acoustic parameters of a ship
The interface for editing the operating modes opens.

Operating modes
Please note, only the operating modes compatible with the category of the ship are displayed.
Interface presentation
This window is used to add, edit and delete operating modes.
The Operating mode field allows you to select the operating mode to edit / display.
•The ![]() button is used to add a new operating mode.
button is used to add a new operating mode.

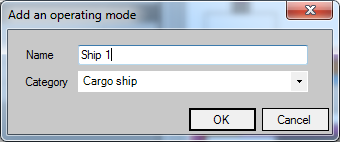
Add a new operating mode
Enter a name and a category of ship. The locations available on the ship depend on the category.
•The ![]() button is used to rename the operating mode.
button is used to rename the operating mode.
•The ![]() button is used to create a new operating mode from the currently selected one.
button is used to create a new operating mode from the currently selected one.
•The ![]() button is used to delete the operating mode.
button is used to delete the operating mode.
The Details section displays the details of the currently selected operating mode.
We find there :
•The category of ship of the operating mode
•A table detailing the locations of the ship with each source it contains. The available locations depend on the category of the vessel (see Categories of ships).
oThe name of the location
oThe name of the source
oThe sub-location
oThe source model (database reference model)
oThe power of the source
oA button allowing to select the reference model of the source.
•Two sectional diagrams in profile view and in top view to visualize where the locations are on the ship.
When selecting a location in the table, it is drawn with a red border in the section diagrams.
Add a source to a location
Adding a source to a location can be done in the following ways:
•Either by double-clicking on a location, then by selecting the reference model associated with the source. The source is directly added to the location.
•Either by selecting a location then clicking on the ![]() button. This function is also accessible by right-clicking then clicking Add a source.
button. This function is also accessible by right-clicking then clicking Add a source.

The reference model associated with the source must then be selected. The source is directly added to the location.
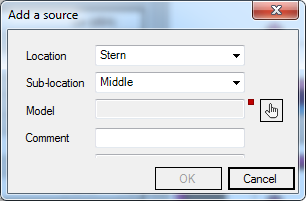
If no location is selected, the window for adding a source is displayed:

Add a source
You must then choose the location and its sub-location.
The ![]() button is used to select the reference model associated with the source.
button is used to select the reference model associated with the source.
A comment can be added to distinguish the source from another.
By clicking OK, the source is added to the location.
Remove one or more sources from a location
To delete a source, you must select the source in the table and click on the ![]() button at the bottom left. This button is also accessible by right-clicking on the source:
button at the bottom left. This button is also accessible by right-clicking on the source:

Remove a source
By right-clicking on a location, it is possible to delete all sources from that location:

Remove all sources from a location
Edit a source
A source can be edited by selecting it and then clicking on the ![]() button at the bottom left. This button is also accessible by right-clicking on the source:
button at the bottom left. This button is also accessible by right-clicking on the source:

Edit a source
This allows access to the source edit window:

Edit a source